How to do Android development faster without Gradle
Hello everybody!
In this tutorial, I will explain how you can develop on Android and make mobile apps without using Gradle and without Android Studio. At the end of this course, you’ll be able to build an APK beyond those tools.
First of all, know that I have my opinions, but I’m open to hear yours, so don’t hesitate to write a comment and I will answer with pleasure.
When I say “faster”, I mean 2 things. It’s faster because Gradle is a heavy tool and if you don’t have a computer with Intel i7 processor and SSD, your builds will be generated really slowly. And I think it can also be faster because Gradle has a complicated working and don’t use it would maybe avoid you to pass several hours on a strange issue.
My solution is combination of IntelliJ IDE, Ant and Bash script. You can download and install IntelliJ here:
To install Ant, simply do:
sudo apt-get install antPrepare the project
Get my “android-project-template”:
git clone https://github.com/authmane512/android-project-template.gitRename the project folder as you want and go inside:
mv android-project-template MyAndroidProject
cd MyAndroidProject
Now, we have to configure the build.sh script. If you open it, you will see on top this:
APP_NAME="Your App Name"
PACKAGE_NAME="your.pkg.name"AAPT="/path/to/android-sdk/build-tools/<your version>/aapt"
DX="/path/to/android-sdk/build-tools/<your version>/dx"
ZIPALIGN="/path/to/android-sdk/build-tools/<your version>/zipalign"
APKSIGNER="/path/to/android-sdk/build-tools/<your version>/apksigner"
PLATFORM="/path/to/android-sdk/platforms/android-<your version>/android.jar"
Write your app, your package name and the paths to needed programs. For me it’s:
APP_NAME="My App Name"
PACKAGE_NAME="my.pkg.name"AAPT="/home/texom512/android-sdk/build-tools/23.0.3/aapt"
DX="/home/texom512/android-sdk/build-tools/26.0.1/dx"
ZIPALIGN="/home/texom512/android-sdk/build-tools/23.0.3/zipalign"
APKSIGNER="/home/texom512/android-sdk/build-tools/26.0.1/apksigner"
PLATFORM="/home/texom512/android-sdk/platforms/android-19/android.jar"
We can easily init our project like this:
./build.sh initThis command will automatically generate files like AndroidManifest.xml, MainActivity.java, activity_main.xml, etc.
As I explained before, in this tutorial we use IntelliJ IDE. After opened it, click on “Open” and select our previous folder:

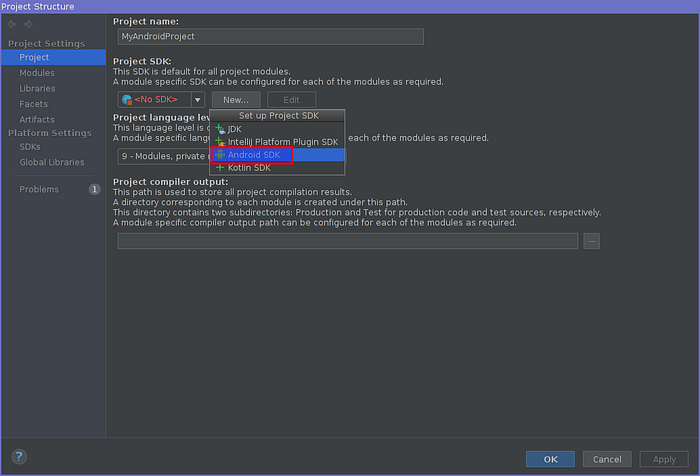
We have to add Android SDK. So go to File -> Project Structure -> Project -> New -> Android SDK:
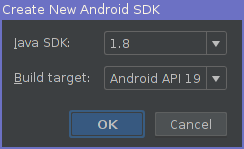
Choose the Android SDK folder which contain “tools”, “build-tools”, “platforms”, etc. Note that you have to choose a Java JDK before. Then select your desired API version:
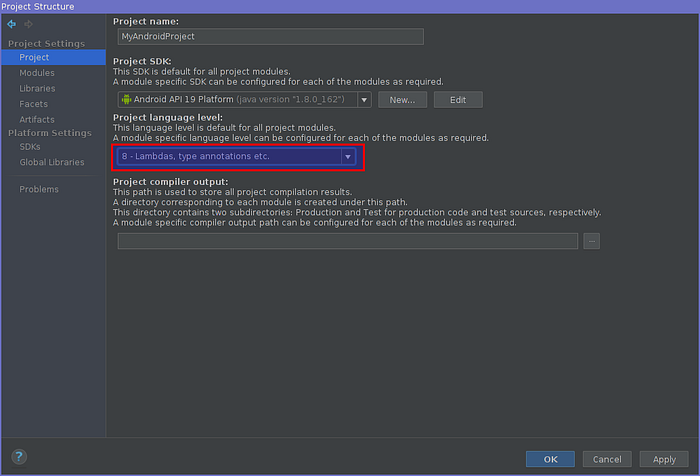
Be sure to use the right language level (here 8):
Now, go to “Modules” and add Android module:
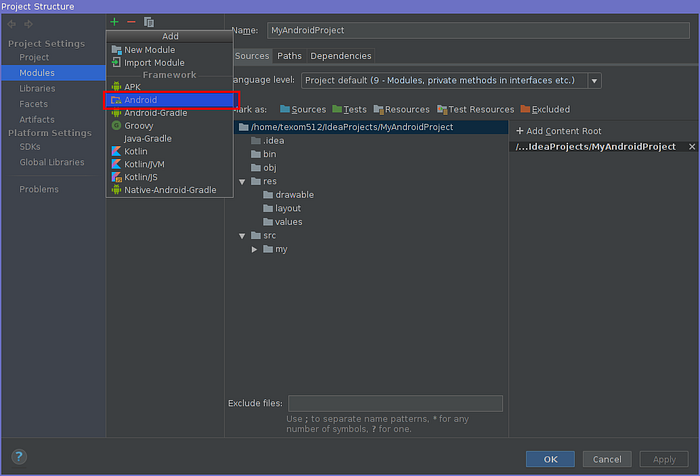
Put res directory and Manifest file locations in “Stucture”:
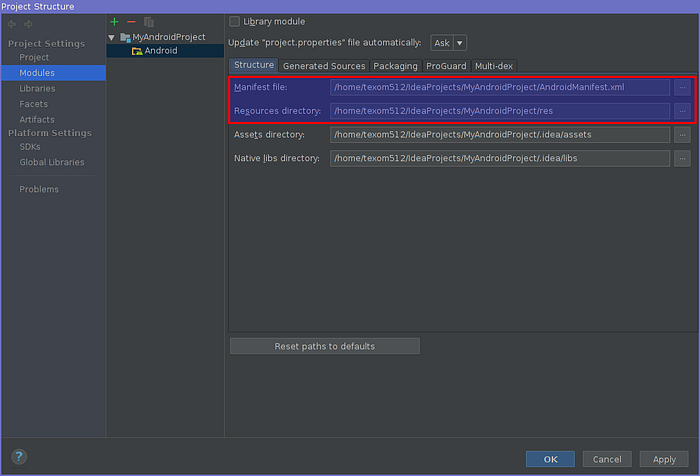
The 2 other directories are not important.
Mark the “src” folder as source folder:
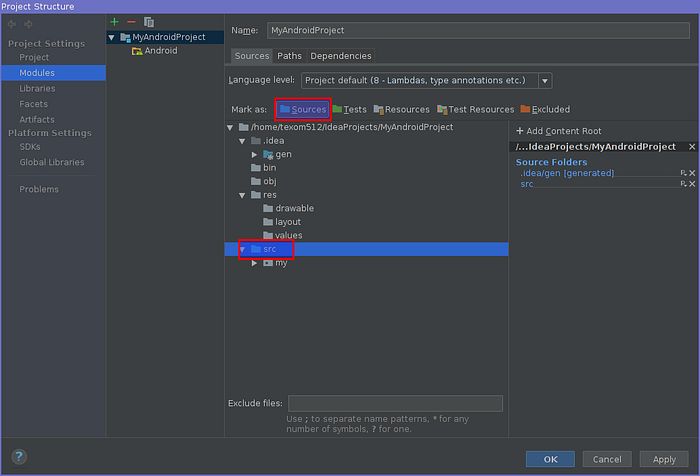
Your project is ready!
Launch test app
Let’s try to make and run an APK! Plug your phone. Make sure that ADB work:
$ adb devices
List of devices attached
X9LDU14B24006604 device
And just do:
./build.sh build-runAfter a few seconds, the app will start on your phone!

Notes and Conclusion
If you want to add source files, you have to modify the build.xml (and know Ant, there are some good tutorials on the internet). It’s also essential to read the build.sh script and understand it generally. Don’t worry, it is really really short. To help you understanding it, you can read this article:
That’s all for this tutorial. Now you have another way to develop on Android. Please, let me know what do you think about this solution.